Overview
With our canopy we sit outside the camper a lot. And because we love our devices we needed a way to keep them charged while we are outside. We also boondock a lot, so while the 120v AC outlet on the outside is nice, we rarely use it.
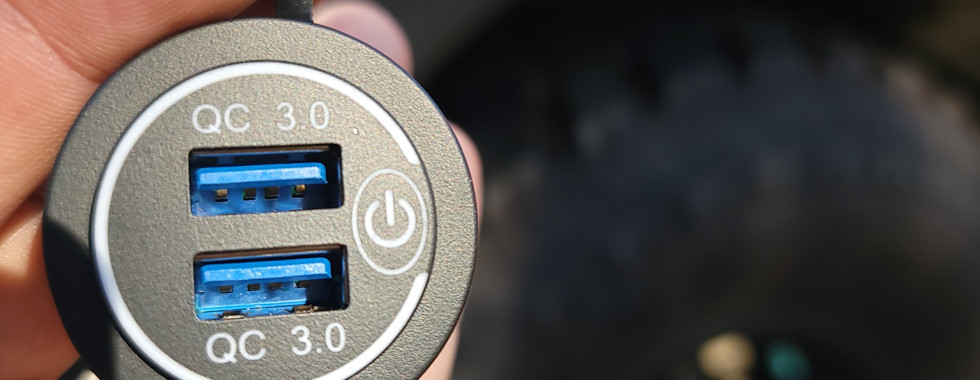
So we decided to install USB connections on the outside. The one below (See Materials) is great and even comes with it's own drill bit to create the whole. It also has a Power Switch on the face so you can turn it on and off from the outside and it will never drain the battery. (So add it to the list of things to check when moving to storage. ;-)
Now, if you're like me, you have been doing a ton of mods, so things like the wire, super glue, etc. are already in your toolbox. But I listed them here in case you don't. I also love the calk and seal because it will not discolor, and it is mold/mildew resistant.
Let's get into the install:
So a couple of things on the install. Double check where you are putting it so you do not drill through a stud. Camper needs all the support it can get. A standard stud finder works on these campers and will tell you where a stud is. Also, the one I used is not long enough to get the back nut on it. So... you can either look for a longer body, or simply do what I did which is a bit of superglue. :-) I selected my spot because it made it easy to chase the new wiring back to the power center following the wiring from the 120v outlet above it.
Let's get to it!
Once you have decided on placement, drill the hole with the provided bit.
Insert the USB connector to check fit.
Slide halfway out and place Calk and Seal around hole and slide back in.
Make sure it is level and press in.
From the back, use Super Glue Gel to lock it in place.
Use wiring that came with it and run along bed frame following 120v wire.
Run additional wire from power center back to end of factory wire. Connect the two with bullet connectors. I do it this way because it is easier to pull it through.
Run ground to ground plane near power center
Run hot to free fuse point in power center. Add 20Amp fuse to Power center
DONE!!!
Photos:
Materials:

2V USB Outlet, AlfredDireck Dual Quick Charge 3.0 USB Car Charger with 1.1inch Puncher, Waterproof 36W USB Power Outlet with Switch
$12.50

Gorilla White 100% Silicone Sealant Caulk, 2.8 Ounce Squeeze Tube, White, (Pack of 1)
$6.74

16 Gauge Stranded Copper Clad Aluminum 100’ Red / 100’ Black Bonded Zip Cord Wire for 12 Volt Automotive Harness Car Audio Hookup Amplifier LED Light Wiring
$17.99

Gorilla Super Glue Gel XL, 25 Gram, Clear, (Pack of 1)
$6.84


