UPDATED 04/04/2022
We have done a lot of improvements to our 2021 Braxton Creek Free Solo Plus (aka 15FK), but the DC wiring has been the biggest one. Our most difficult effort through this set of upgrades has been wiring diagrams, so I created my own.
Original Design
The only things from the below that were not factory when we purchased the camper was the batteries (We bought two Ampere Time 100 Ah LiFePO4 to replace the 50Ah Flooded Lead batteries), and the solar at the bottom (We bought a Renogy MPPT with 60 amp controller and two 100w free standing panels).

Part of the issue with this design is 1) The solar ready connection is really just a port wired directly to the battery, 2) EVERYTHING is wired to the Battery + Junction Box on the tongue and then goes to the Breaker Box. This means everything like the radio, carbon monoxide detector is in an always on state, even in storage which will drain the batteries. If you stay with the flooded batteries this will drain them well below the recommended range and will kill the batteries rendering them worthless!
Also..... The camper manufacturer (Braxton Creek) decided to go with the basic Power Control Center WF-8955PECB, instead of the WF-8955PEC-B-LIS for $40 more. This is a pure lack of forward thinking in their Customers moving from the standard 50Ah Flooded Lead battery that comes with it to Lithium... The LIS comes with a switch to optimize charging for Lithium batteries. We will not looking to replace the converter because the solar will give us an optimal charge through the MPPT controller to maintain a 100% charge.
Moving on...
Current Design
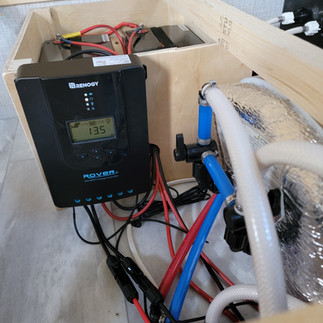
So here is our improved design. Batteries are now moved inside (Don't do this with Lead batteries!), and the MPPT controller is permanently connected. This redesign brings the batteries in off the tongue to improve security, battery temperature management, and allows us to have the controller connected all the time as opposed to a temporary outside connection. The + side connection from the MPPT controller to the battery is run through the kill switch so it doesn't leach on the batteries.

To achieve this we
1) built a box for the batteries
2) Moved the batteries inside
3) Permanently mounted the controller at the battery box
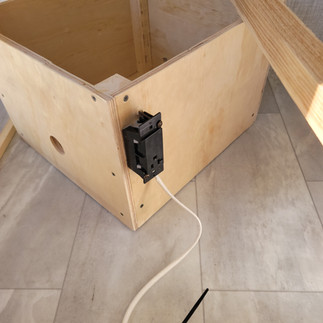
4) Moved the Kill Switch from the battery box inside to an accessible point
5) Rewired the + line that ran from the Positive Connection Box to the Power Control Center and rerun to directly to the batteries
6) New line to the Kill Switch
7) Line from the Kill Switch to the Power Control Center
8) Lines from Solar Ready to MPPT Controller (Both Positive and negative need to be run direct on this one).
Number 6-7 above allows us to kill EVERYTHING with the switch to ensure zero drain to the batteries. This also allows us to charge in tow while keeping the camper off.
BUT -> To charge while on shore power the switch must be on as the charge feed comes from the Power Center.
Footnote: For those with the Braxton Creek 15FK or Free Solo Romo who ripped out the back rest at first chance, you will be happy to hear it is the perfect amount of materials needed to build the storage box for the batteries. :-)
One last note here. Weight distribution to prevent sway is a SERIOUS THING. So, if you are replicating my mod here, know you are changing the weight distribution of the camper. Doing this that you are removing the weight of the Flooded Lead Acid battery (26 lbs Weight) and moving the weight to the back with two batteries ( at 24.25 Pounds each, 48.5 lbs total). This means in general.... you changed your weight distribution a TOTAL of 75 lbs to the rear of the axle. This is not a perfect measurement given that the weight is also based on distance from the angle and can change the + or - weight of the change.


Here are a couple videos of the finished product. Additional photos from this project are below.
Hope you have enjoyed this post, and hopefully it has been or will be of value to others about to go on this same journey!!


